
One of the neatest things about being part of an online community like Martha Stewart's Dreamers into Doers is the opportunity to meet and collaborate with fellow artisans and entrepreneurs from all over the globe. I've made friends there who are bakers and crafters like me, jewelry artisans, event planners, and more. I've received some helpful advice about growing our little cake pop business and have been thrilled to even give a few tips myself (makes me feel like an expert, ha ha!). We DiD'ers, as I affectionately call our group, support each other's blogs, Facebook pages, and IRL experiences. It's really an awesome community. Go check it out when you get a chance!
So now you're saying, "That's nice that you found a supportive online community. Congratulations. What does that have to do with clowns???" Okay.
From time to time, we share our products with one another. That's where the clowns come in. :) One of my fellow DiD'ers (Amy of Make It Mine Parties) has an online party supply store and is having a Circus themed party for twin girls who turn 5 this weekend. Some DiD artisans are sharing their awesome tutus, bracelets, etc. We sent her 2 dozen clown cake pops!

Here are the steps we took to make them, in case you want to make some of your own. You'll need cake, frosting, white candy melts, red candy melts, red string licorice, blue string licorice, a round red candy (we used Red Hots 'cause they're nice and bright and kids seem to really like them), little ball sprinkles, 4" lollipop sticks, and bright ribbons. As for tools, grab your coffee stirrers, scissors, and some tweezers! And don't forget a styrofoam block to stand them in as you work.
1) Bake, cool, and crumble your cake.
2) Mix your cake with frosting, let set for about 30 minutes, and roll into balls (about 1.25" in diameter).
3) Chill the balls in your fridge for several hours or in your freezer for about 15 minutes -- be careful not to freeze them.
4) While your cake balls are chilling, prepare your candy decorations -- cut the red licorice into 1/2" pieces, cut the blue licorice into 1" pieces, and separate out your blue & green sprinkles from the rest in the bottle.
5) Melt your white candy melts in a deep cereal bowl (easy to do in the microwave at 40% power, stirring every 30 seconds until melted).
6) Dip your lollipop stick 1/2" into the white melts and insert it into the cake ball -- no more than half way. Do this for each one.
7) Put the pops back in the fridge to harden -- about 5-7 minutes.
8) Making sure your white candy melts are good and fluid (stick them back in the microwave briefly if you have to), take a pop out of the fridge and dip it in the candy melts. Cover the cake ball completely, all the way to the stick. Tap off the excess coating.
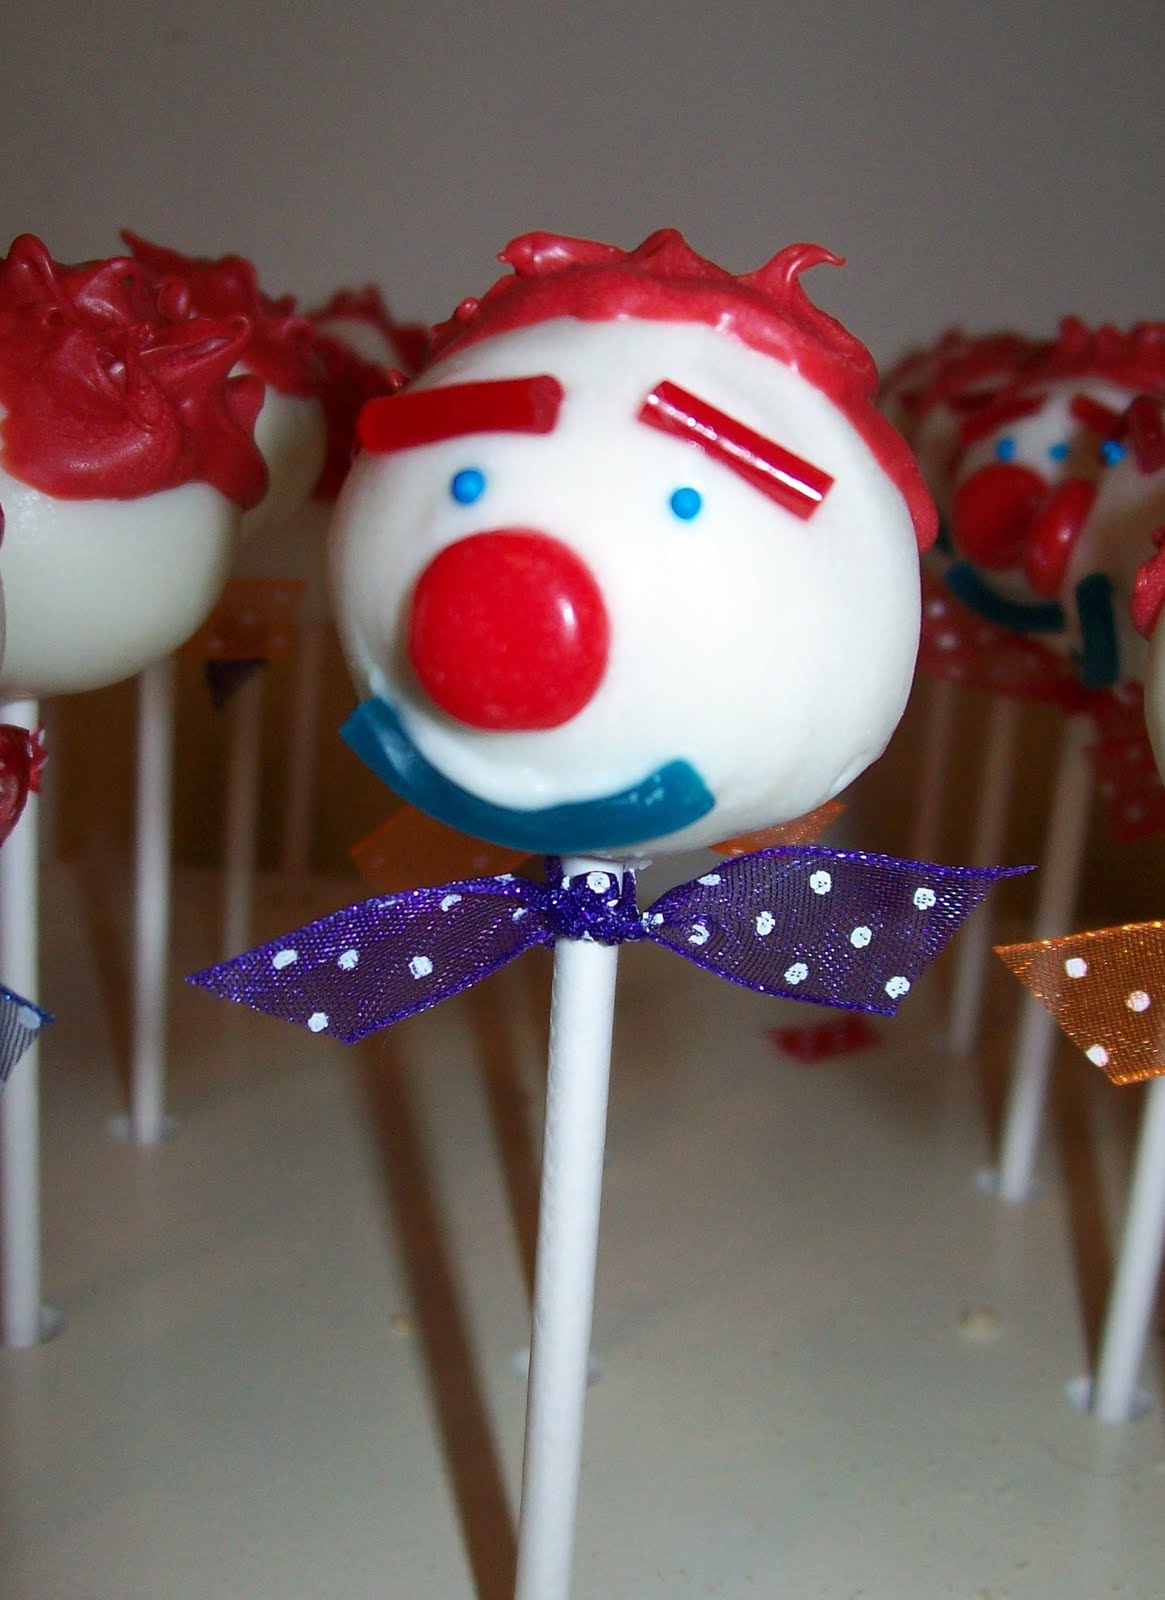
9) Let the candy coating set on the pop for about 10 seconds, then use the tweezers to place your candy face on your clown pop. Follow the photo as an example. Set the pop into the stand to dry.
10) Do this for all your pops, re-melting your candy melts in the bowl as necessary.
11) Now melt your red candy melts. You don't need it too fluid. Just a little beyond soft is fine -- like creamy peanut butter consistency.
12) Using your coffee stirrer, dab the red melts onto the top of your clown's head and spread it around to give him as much (or as little) hair as you like.
13) Again using the stirrer, tap the clown's hair and pull outward. You want to pull the melts up and out so they form peaks on his head. Repeat around the head until you get the look you like.
14) Do this for all your pops.
15) Cut your ribbon into 4" pieces and tie a ribbon just under each clown pop head to make the bow tie.
16) Celebrate 'cause you're done!
Have fun with the clowns! And have a great day today!
~ Pia
These pops are absolutely gorgeous! Thank you so much for the instructions. Will have to give these a go ;-) Lauren
ReplyDeleteSo Cute Pia, Thanks for sharing your instructions.
ReplyDeleteLisa ~HR Creative Design Studio
Love, Love, LOVE! Excellent treat idea for my DD's 3rd Birthday party! Thanks for sharing!
ReplyDelete